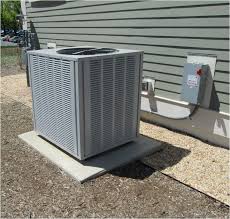
Now that summer is winding down and so is your outside air conditioner, it’s probably full of dirt and dust particles from being used so often. While regular air conditioning maintenance is not always common, frequent cleaning can extend its lifespan, allowing you to save a pretty penny from your hard work.
As there are a number of fall cleaning and maintenance chores to be done before winter arrives, cleaning your air conditioner is not one that should be skipped. Tending to this much-needed appliance can also prevent the risk of water damage as it often uses cold water to cool down the outside air. Here are some tips on how you can save both time, energy, and money when cleaning an outside air conditioner.
Cleaning Outdoor Air Conditioning Unit – What You Will Need
Depending on the air conditioning unit, you have you will need tools to remove the top of the air conditioning unit as well as a cleaning solution that is safe to use on the surface. Thankfully, many of these items you will already have around the house. Just make sure that you have everything before starting the project.
- Water hose and sprayer
- Proper protection (eyewear and gloves)
- Air conditioner coil cleaner
- Towel
- Air filter (size will vary)
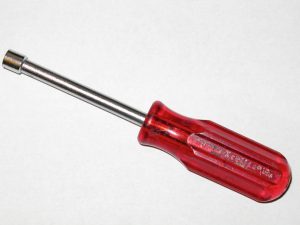
- Hex Head Nut Screwdriver (size will vary according to each unit)
Take Proper Safety Precaution
Before even touching the unit, you will want to make sure that the power is turned off for safety measures. This can be done by locating and disconnecting the condenser (the outside unit) that is attached to the structure. After opening the lid on the service disconnect attached to the structure, you will see a handle to pull to disconnect the air conditioner from the power supply. Close the lid afterwards to avoid accidentally turning it back on.
If you do not have a service disconnect on your unit, find the breaker in your electric panel that supplies power to the unit and shut it off. This way you will avoid any injuries during the cleaning process.
Remove the Lid of the Air Conditioner
Now that the power is properly turned off, use the hex nut drivers to remove the bolts connecting the lid to the unit. Then carefully lift the top off with the fan and motor attached. Do not remove the fan, motor, or any wiring from the lid as the process will become more technical. Carefully place the lid on the ground without applying stress or any weight on the wires.
Also be careful not to damage the fins that are installed on sides of the condenser. They are used for pulling air into the unit and if damaged, they will decrease the efficiency of the unit and cause it to work harder. If any are accidentally smashed in the cleaning process, combs can be bought and used to straighten them back out.
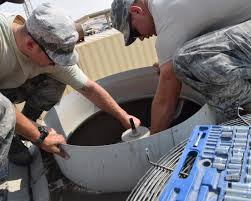
Start the Cleaning Process
After the lid is fully removed and there is no stress applied to the wires, you should have full access to the unit’s coils. You can start by removing leaves, grass, and any dirt in or at the bottom, pulling them out by hand. Taking these debris out will prevent any water and moisture from becoming trapped within the unit, which can lead to rust and mold growth. After removing the debris, lay the towel flat against the service panel to catch the majority of the water from entering the panel.
Next, use the hose to spray all around the area to remove the leftover debris. Just be sure to use a low water pressure to avoid damaging the fins on the outside. Also try to not spray directly on the service area to prevent damage. But don’t be afraid to clean all other areas as the unit is frequently doused with rain on a regular basis.
After you are done cleaning the inside of the air conditioner, you should be able to see straight through the fins now that all the dirt, leaves, and debris are gone.
Replace the Air Filter and Clean the Drain
Both the spring and fall seasons are great for changing air filters and preventing airborne dust and hair. At any time you notice a lot of dust on household surfaces, you should probably schedule a professional air duct cleaning appointment.
Otherwise, make sure that the air filter is not clogged and the fan does not have to work harder than needed. If this happens, the evaporator coil will likely freeze and break the machine, causing water to leak to the floor and cause significant damage. If your building materials were affected, you will need to call a professional restoration company to restore or replace them. You will also need to replace the air conditioner.
But as long as you don’t have this mess, it is a good idea to clean the drain to decrease the risk of blockage. You can use an eco-friendly cleaner, such as Simple Green, to remove any wet debris from the unit.
Cleaning the Evaporator Coil
The last part of the cleaning project is to clean out the evaporator coil, the top part of the A/C unit that holds the filter and is connected to the refrigerant. If you can, try to remove any debris, hair, and dust that got past the air filter to prevent it from being dispersed into breathing air again. If you are not able to do it yourself, allow an HVAC cleaning professional to do it for you during your next appointment.
Just be sure not to touch the refrigerant. Attempting to clean this area without the necessary experience and proper certification can result in severe injuries as well as heavy fines for contaminating the air quality.
Taking Additional Precautions
While proper cleaning and maintenance of your air conditioning unit can save a lot of money by extending its lifespan, other issues can occur, such as motor failure and the evaporator coil freezing. While they are not common for those who frequently clean, it is impossible to avoid these malfunctions altogether. Contact your local heating and cooling repair specialist.
Air conditioners are also one of many common culprits for causing water damage. If you have found any puddles or pools of water around your unit, contact both your cooling specialist as well as a water damage restoration company.
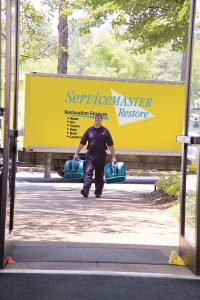
After removing the source of the damage, the water cleanup technicians will be able to return all building materials to their original conditions. Your local ServiceMaster would be the best choice as they are licensed, trained, and experienced to respond right away and return all affected areas to their original conditions, even preventing mold growth in the process. Don’t hesitate to call them in any water emergency.