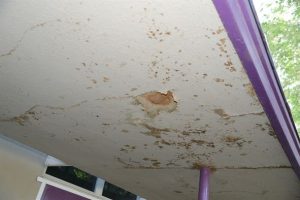
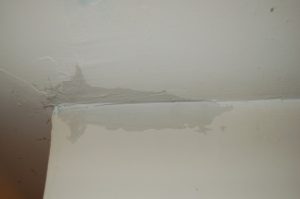
Especially if it is in an open area, a ceiling with a patch of water damage can really detract from the aesthetics of an entire room. If there are multiple spots in a commercial building, it can impact the first impression of a customer or client. But many property owners shy away from the hassle of having it fixed, due to money, time, or not knowing how to fix it themselves. However, as long as it is not significant, a small area of the water-damaged ceiling can be fixed cost-effectively with the use of a few products and equipment, including a paint scraper or putty knife, utility knife, nails and screws, power drill, hammer, sandpaper, joint compound, plywood or particleboard, primer, and paint (make sure that the color matches your ceiling).
Steps to Fix a Water-Damaged Ceiling
 1. Remove the Source of the Water Damage
The first step in repairing the water-damaged ceiling drywall is finding and removing the source. This can include any of the following: rain and thunderstorms, leaking or burst pipes, sewage backup, or a malfunctioning appliance, such as the washing machine, water heater, dishwasher, etc.
If you see a significant amount of water damage, do not hesitate to contact a professional water damage restoration service. They must dry out the affected area or replace it with advanced equipment.
But as long as the damage has not spread too far and you have made the necessary repairs, dry out the affected area with a fan, towels, or vacuum. But do not use a ceiling fan if it is close to the damaged area. You will also want to see if there is any mold growing on or behind the area and have it removed right away.
2. Cut Out the Damaged Area
After the water-damaged area has been completely dried and cleaned of mold, make sure all electrical wiring, pipes, and other building materials are cleared out of the way on the other side of the ceiling. Then you can start removing any bulging or loose parts of the drywall by scraping them off with a putty knife or a paint scraper.
After the loose, bulging, or hanging parts have been removed, use a utility knife and carefully cut around the affected area, pulling it out as you go.
 3. Prepare the Ceiling for Replacement Drywall
After the damaged area has been completely removed, you can then smooth out the small bumps in the drywall that the water damage has created with a piece of sandpaper. Focus on the areas between the affected and unaffected drywall as smoothing them out will help secure the new drywall in place.
Lastly, mark the areas in which the metal joists are located in the ceiling; this is where you will be installing the new ceiling.
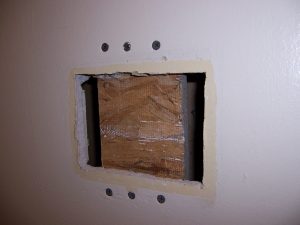
4. Install the New Drywall
Depending on the size of the drywall you need, you can buy new sections of the building material at your local hardware store. Just make sure to get all the dimensions of the area before you go because they will cut it out for you.
Once you have the new piece, you can secure it to the metal joists (located in the areas you have marked) with nails and screws, spaced 4 – 6 inches apart.
If you want to make it stronger, you can attach a piece of plywood or particleboard as a base and it will support the new drywall if you suspect it will be under a lot of stress.
If there is only a small area to be replaced, you can use joint compound and sandpaper to fill and smooth over the holes.
 5. Adding Sealer, Paint, and Primer
To add the finishing touches, add a coat of joint compound between the cracks of the new drywall to seal them properly.
After the joint compound has dried completely, smooth out the area with sandpaper and apply a layer of primer to allow the new material to blend in with the rest of the ceiling. Finally, you can add the finishing touches with a coat of paint and your repaired ceiling is done!
Contact Professionals for Help
Many cases of small water damage can be treated using some tools and equipment from a local hardware store; however, if the entire ceiling has been damaged and the water is dripping onto the floor, do not hesitate to call for professional water restoration services. If the water has been left untreated for a period of time, you will also want to consider mold removal services as bacteria can easily grow in wet building materials.
Zenith Disaster Clean Up is a professional water damage restoration and disaster cleaning company that specializes in these types of emergencies. Their technicians are trained, certified, and experienced to arrive right away with advanced products and equipment to return the affected building materials to their original condition. They will also help with replacements if the damage has spread too far beyond repair.